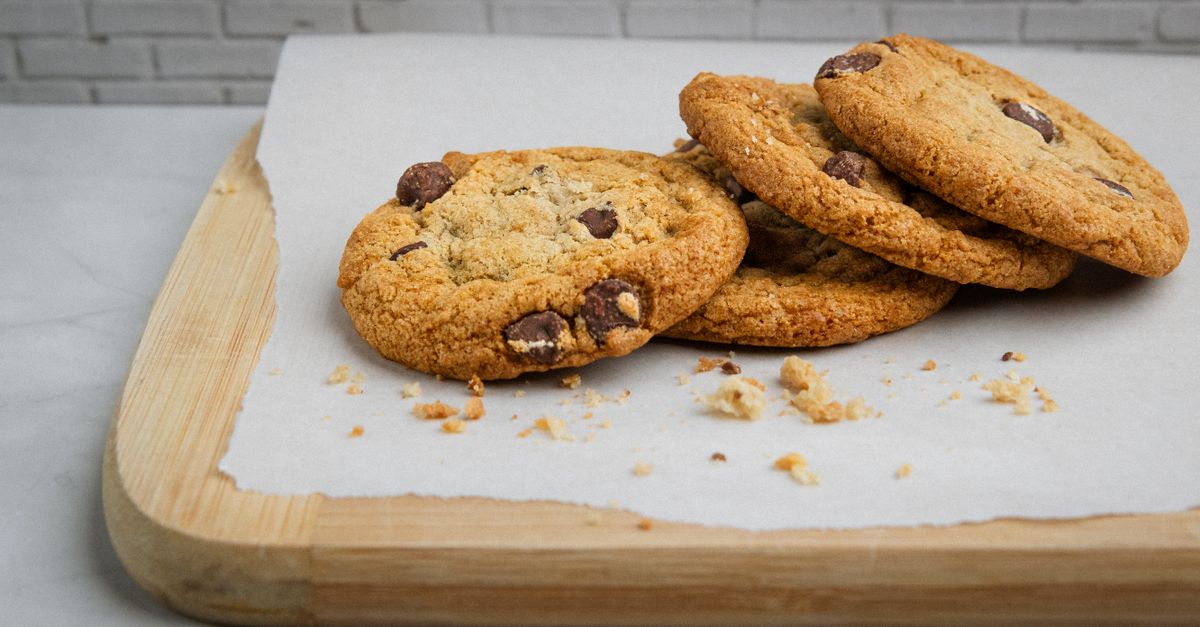
Why Your Homemade Cookies Are Hard, Not Chewy (And The Simple Shifts That Guarantee Soft Perfection Every Time)
You spend all that time mixing, scooping, and waiting, only to pull a tray of beautiful-looking cookies from the oven that cool into hard, crumbly disappointments. Sound familiar? I’ve been there more times than I care to admit. For years, my homemade chocolate chip cookies, oatmeal raisin, and even simple sugar cookies had a frustratingly short window of perfect chewiness before transforming into stale, rock-hard hockey pucks. It was demoralizing, especially when I’d see friends or professional bakers consistently churn out soft, tender, melt-in-your-mouth cookies day after day.
The mistake I see most often, and one I certainly made, is blaming the recipe itself. We endlessly search for the ‘perfect’ recipe, tweaking flour types or adding an extra egg, thinking a magic ingredient is the missing link. But in my experience, the problem often lies less with the ingredients list and more with how you handle those ingredients and the baking environment itself. It’s a series of small, often overlooked shifts that collectively transform a hard cookie into a consistently soft, chewy masterpiece.
After countless failed batches and a deep dive into the science of baking, I finally cracked the code. What changed everything for me wasn’t a new recipe, but a deeper understanding of moisture, sugar, and heat. These aren’t just abstract concepts; they translate into concrete actions you can take in your kitchen, starting with your very next batch. Let me share the game-changing insights that took my cookies from hard to heavenly, every single time.
Key Takeaways
- Ensure butter and eggs are at room temperature to create a smooth, emulsified batter that traps moisture.
- Adjust your sugar ratios, specifically using more brown sugar than white, to boost moisture and chewiness.
- Carefully measure your flour by weight, not volume, to prevent over-flouring and dry, hard cookies.
- Avoid overbaking by pulling cookies from the oven when edges are set but centers still look slightly underdone.
- Implement a strategic cooling process to lock in moisture and prevent cookies from drying out too quickly.
Room Temperature Matters: The Unsung Hero of Cookie Texture
One of the most foundational shifts I made, and one that’s often glossed over, is consistently bringing butter and eggs to true room temperature. For years, I’d take butter straight from the fridge and soften it in the microwave (a common mistake that melts it unevenly), or just crack eggs that had only been out for 10 minutes. This seemingly minor oversight has a monumental impact on your cookie texture.
Here’s why: when your butter is properly softened (around 68-70°F or 20-21°C), it can cream thoroughly with your sugars. This creaming process isn’t just about mixing; it’s about incorporating air. These tiny air pockets are crucial because they create lift and a tender structure. If your butter is too cold, it won’t cream effectively, resulting in a dense batter that yields hard, compact cookies. If it’s too warm, it becomes greasy and won’t hold air, leading to flat, hard cookies.
The same goes for eggs. Cold eggs don’t emulsify properly with the creamed butter and sugar. This means your batter will be less cohesive, and the fat and liquid won’t integrate as smoothly. A well-emulsified batter holds moisture better, leading to a softer, chewier final product. I now plan at least an hour ahead, sometimes two, to let butter and eggs sit on the counter. In a pinch, for eggs, you can place them in a bowl of warm (not hot) water for 5-10 minutes. For butter, cutting it into smaller pieces can speed up the softening process, but avoid the microwave at all costs unless you want a melted mess.
The Sweet Secret: Balancing Sugar for Optimal Chewiness
If you want chewy cookies, you need to pay serious attention to your sugar ratios. This was a revelation for me. I used to think all sugar was created equal in a recipe, but brown sugar and white granulated sugar play very different roles in cookie chemistry, especially when it comes to moisture and texture.
Brown sugar is hygroscopic, meaning it attracts and retains moisture. It also contains molasses, which adds not only flavor but also acidity that helps keep cookies softer. A higher ratio of brown sugar to white sugar will almost always result in a chewier, softer cookie that stays moist for longer. For example, if a recipe calls for equal parts brown and white sugar, I’ll often increase the brown sugar by about 25-50% and reduce the white sugar by the same amount, keeping the total sugar volume consistent. So, if it calls for 1 cup brown and 1 cup white, I might do 1.5 cups brown and 0.5 cups white. This subtle tweak changed my cookies from brittle to bendy.
White granulated sugar, on the other hand, contributes to spread and crispness. It melts more cleanly and creates that signature lacy edge many cookies have. While it’s essential for structure and some crispness, too much white sugar without enough brown sugar is a direct path to a hard cookie, especially after cooling. Experiment with your favorite recipes; you’ll find that small adjustments in the brown-to-white sugar ratio can dramatically alter the texture towards your desired chewiness.
The Flour Factor: Why Precision Prevents Pucks
Ah, flour. The bane of many a baker’s existence when it comes to precision. For years, I simply scooped flour directly from the bag into my measuring cup, leveling it off with a knife. This seemingly innocuous technique, common among home bakers, was actually adding up to 25% too much flour to my recipes. And excess flour is a guaranteed route to dry, hard, dense cookies.
Think of it this way: flour absorbs liquid. More flour means more absorption, leaving less free moisture in your dough to keep the cookies soft. The solution is simple but requires a small mental shift and a kitchen scale: measure your flour by weight. A standard cup of all-purpose flour weighs approximately 120-125 grams. Instead of cups, I now measure every gram. This ensures consistency and accuracy every single time.
If you don’t have a kitchen scale, the next best method is the “spoon and level” technique. Gently spoon flour into your measuring cup until it’s overflowing, then use the back of a straight edge (like a butter knife) to level it off without compacting the flour. Never pack flour down into the cup, and never scoop directly from the bag. This simple habit, once adopted, will immediately improve the tenderness of your cookies. You’ll notice a more pliable dough and, crucially, a softer bite in the finished product.
The Golden Window: Master the Art of Underbaking
This is perhaps the most crucial technique for achieving consistently soft cookies: learn to underbake, just slightly. Many home bakers, myself included, used to bake cookies until they were deeply golden brown and firm all over, assuming that meant they were ‘done.’ The reality is, by the time a cookie looks perfectly golden and firm on the baking sheet, it’s already well on its way to becoming hard and brittle once cooled.
Your oven is like a sauna for cookies. Once removed, residual heat, often called carryover cooking, continues to bake them for several minutes. What looks slightly underdone in the oven will firm up perfectly as it cools. I now pull my cookies from the oven when their edges are just set and lightly golden, but their centers still look noticeably pale, puffy, and even a little raw or glossy. Sometimes, they might even seem too soft to handle.
This isn’t an exact science, as oven temperatures and cookie thickness vary, but generally, this means taking them out about 1-2 minutes before you think they’re ready. For most standard chocolate chip cookies, that might be 9-11 minutes instead of 12-14. This precise timing ensures that the interior remains moist and chewy. When you transfer them to a cooling rack, you’ll see them firm up as they cool, retaining that perfect, soft texture rather than solidifying into crunchy shards.
The Cool Down Conundrum: Lock in the Moisture Strategically
The cooling process is just as critical as the baking process, yet it’s often an afterthought. How you cool your cookies dramatically impacts their final texture and how long they stay soft. The biggest mistake is letting cookies cool completely on the hot baking sheet or, conversely, transferring them too quickly to a wire rack. You need a strategic cool-down to lock in moisture.
First, leave the cookies on the hot baking sheet for just 2-5 minutes after removing them from the oven. This allows the residual heat to continue setting the centers (the carryover cooking I mentioned earlier) without overbaking the edges. If you move them too soon, they might fall apart or lose their shape due to the still-fragile centers. This short rest period also helps them transition from oven heat to room temperature more gently.
After this brief period on the baking sheet, immediately transfer them to a wire cooling rack to cool completely. Why a wire rack? It allows air to circulate all around the cookie, preventing condensation buildup on the bottom (which can make them soggy) and ensuring even cooling. If you leave them on the hot pan for too long, the bottoms will continue to cook and inevitably become hard. Once fully cool, store them in an airtight container at room temperature. For extra longevity in softness, I often place a half-slice of bread in the container; the cookies will absorb moisture from the bread, keeping them soft for days.
Frequently Asked Questions
Q1: Can I still get chewy cookies if I only have white sugar?
A1: It’s more challenging, but yes. You can try adding a tablespoon or two of honey or corn syrup to your recipe, as these are also hygroscopic and help retain moisture. Alternatively, slightly reducing the flour and increasing the liquid (like an extra egg yolk) can also help, but be cautious with these substitutions as they can alter the overall structure. The best long-term solution is to stock brown sugar.
Q2: My cookies are always flat and hard. What’s wrong?
A2: Flat and hard cookies often point to a few culprits: over-softened butter (too warm), not enough flour (measured by volume, or not enough chilling time), or too much leavening agent. Ensure your butter is cool to the touch but pliable, measure flour by weight, and if your recipe calls for baking soda, make sure it’s fresh and correctly measured. Chilling the dough for at least 30 minutes can also help prevent excessive spreading.
Q3: How do I store cookies to keep them soft for longer?
A3: Once completely cooled, store your cookies in an airtight container at room temperature. For an extra boost of moisture, place a half slice of plain white bread, a small piece of apple, or a few orange peels inside the container with the cookies. The cookies will absorb moisture from these items, keeping them soft for several days. Avoid refrigerating cookies, as this can dry them out.
Q4: My recipe calls for unsalted butter. Does it matter if I use salted?
A4: While many bakers prefer unsalted butter for precise salt control, using salted butter will generally not make your cookies hard. The main impact will be a slightly saltier taste, and you might need to reduce any added salt in the recipe by about ¼ teaspoon per stick (113g) of salted butter to balance the flavor. Texture-wise, the impact is minimal compared to other factors.
Q5: Can I freeze cookie dough for later baking?
A5: Absolutely, and it’s a fantastic way to ensure fresh, soft cookies on demand! Scoop your dough onto a parchment-lined baking sheet and freeze until solid, about 1-2 hours. Then transfer the frozen dough balls to an airtight freezer bag. When ready to bake, you can bake them directly from frozen; just add 2-4 minutes to the baking time until the edges are golden and the centers are slightly soft.
Conclusion: Your Journey to Perfect Chewy Cookies Starts Now
Moving from hard, crumbly cookies to soft, chewy perfection doesn’t require a secret family recipe or a professional baking degree. It demands attention to detail and an understanding of the subtle science at play in your kitchen. By consistently bringing your ingredients to room temperature, balancing your sugars for moisture retention, measuring flour accurately, learning the art of slight underbaking, and strategically cooling your cookies, you’ll unlock a level of cookie bliss you might not have thought possible.
My own baking journey was transformed by these insights, and I’m confident yours will be too. Stop chasing the ‘perfect’ recipe and start mastering the techniques. The next time you’re craving a batch of homemade cookies, implement these shifts. You’ll not only bake better cookies but also gain a deeper appreciation for the craft. Go on, embrace the chewiness!
Written by Sarah Jenkins
Home budgeting and frugal living
A former community organizer, Sarah brings a knack for finding resourceful solutions to common household challenges.
You Might Also Like

Why Your DIY Furniture Makeover Chips and Peels (And How to Get a Lasting, Pro Finish)
Stop chipping and peeling! Discover the overlooked mistakes in DIY furniture makeovers and pro techniques for a durable, flawless finish that lasts.

Why Your Homemade Cookies Are Flat, Not Puffy (And The Pro Secrets That Guarantee Bakery-Perfect Results Every Time)
Ever wonder why your homemade cookies spread flat instead of staying puffy? Discover the pro secrets to achieve bakery-perfect results.
Why Your Homemade Cookies Are Flat, Not Puffy (And The Pro Secrets That Guarantee Bakery-Perfect Results Every Time)
Tired of flat cookies? Discover the overlooked mistakes in your baking and the pro secrets for perfectly puffy, chewy cookies every time.