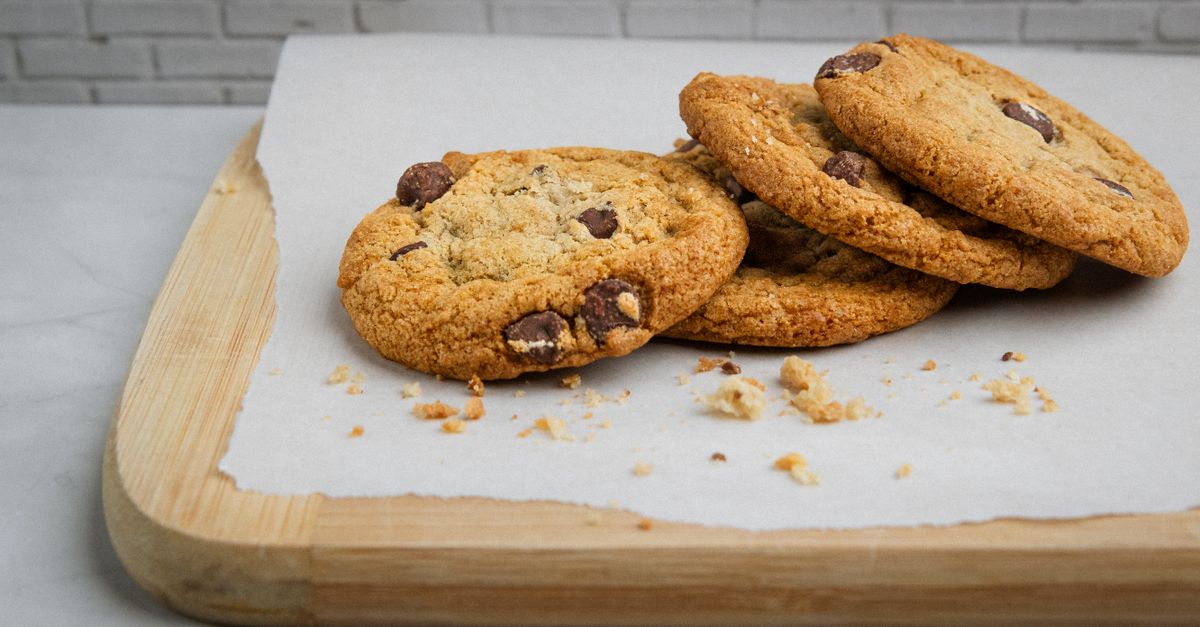
Why Your Homemade Cookies Are Hard (And The Simple Shifts That Guarantee Chewy Perfection Every Time)
Are you tired of pulling what looks like a perfect batch of cookies from the oven, only to bite into a hard, crumbly disc that crumbles into oblivion? I know the feeling. For years, my homemade cookies, while delicious in flavor, consistently lacked that coveted soft, chewy texture. They were edible, sure, but far from the bakery-style perfection I craved.
I’ve spent countless hours, and more than a few ruined batches of dough, trying to figure out where I was going wrong. It felt like a culinary mystery. Was it my oven? My ingredients? My technique? Turns out, it was a combination of subtle but significant errors that most home bakers make, often without even realizing it. The good news? The fixes are surprisingly simple, and they’ve transformed my cookie game entirely. Now, every batch emerges golden, soft, and satisfyingly chewy.
I’m Sarah Jenkins, and I specialize in home budgeting and frugal living, but my passion for making delicious, budget-friendly food at home extends to baking. I believe that enjoying homemade treats shouldn’t require professional chef skills or expensive equipment. It just needs a little insight into the science of baking, and knowing which small shifts make the biggest difference. If you’re ready to say goodbye to hard cookies forever and hello to chewy bliss, let’s dive into the common culprits and, more importantly, what actually works.
Key Takeaways
- Ensure your butter is at a true room temperature, not melted or too cold, for proper creaming and aeration.
- Avoid overmixing the flour into your dough; mix just until combined to prevent gluten development and tough cookies.
- Understand your oven’s true temperature with a thermometer, as oven calibration issues are a major cause of dry, hard cookies.
- Bake cookies for a shorter duration than you might think, pulling them out when edges are set but centers are still slightly soft.
The Real Culprit: Your Butter’s Temperature (And How to Nail It Every Time)
This might sound overly specific, but the temperature of your butter is arguably the most critical, yet most overlooked, factor in achieving chewy cookies. For years, I either used butter straight from the fridge (too cold, leading to dense dough) or impatiently nuked it in the microwave (partially melted, a disaster). Neither yields good results.
The mistake I see most often is using butter that’s too cold or too warm. When butter is too cold, it doesn’t cream properly with sugar. Instead of creating tiny air pockets that contribute to a soft texture, you end up with a denser, more uniform mixture. The sugar crystals don’t effectively cut through the cold butter, hindering aeration. On the flip side, melted or overly soft butter (think greasy, oily) can’t hold air at all, leading to flat, hard cookies that spread too much.
What changed everything for me was understanding what ‘room temperature’ butter truly means: it should be soft enough to indent easily with your finger without melting, but still hold its shape. Ideally, this means butter left on the counter for 30-60 minutes, depending on your kitchen’s temperature. For a quick hack, if you forgot to take it out, cut your cold butter into small cubes, spread them on a plate, and let them sit for 10-15 minutes. This increases the surface area, allowing it to soften faster without melting. I even keep a small, sealed container of butter on my counter specifically for baking, replenishing it daily. This small shift ensures consistent results and saves me the panic of forgetting to soften it.
When you cream properly softened butter with sugar, you’re incorporating air, which creates a lighter texture. This aeration is what makes the difference between a dense, hard cookie and a light, chewy one. Don’t rush this step; cream for a good 2-3 minutes until the mixture is visibly lighter in color and fluffy. This foundational step is non-negotiable for chewiness.
Overmixing Your Flour: The Gluten Trap That Leads to Toughness
Another common error I repeatedly made was overmixing the dough once the flour was added. I used to think ‘the more I mix, the more uniform the cookie will be.’ Oh, how wrong I was. This is where the science of gluten comes into play, and it’s a game-changer for cookie texture.
The hidden trap is developing too much gluten. Flour contains proteins called glutenin and gliadin. When these proteins are hydrated and agitated (i.e., mixed), they form gluten strands. In bread making, gluten development is crucial for structure and chew. In cookies, however, too much gluten leads to a tough, dry texture – the exact opposite of what we want. Think of it like kneading bread dough; the more you knead, the chewier and tougher the bread becomes. We don’t want bread-like cookies!
What actually works is mixing the flour just until combined. As soon as you add the flour, switch to a lower speed on your mixer, or better yet, finish by hand with a spatula. Mix only until there are no visible streaks of dry flour left. It might look slightly shaggy or uneven, but that’s perfectly fine. A few seconds too long can be the difference between a tender, chewy cookie and a hard, dense one. I’ve found that stopping before it looks ‘perfectly smooth’ is key. It takes practice to know when to stop, but err on the side of undermixing rather than overmixing once the flour goes in. This minimal mixing prevents excessive gluten formation, allowing your cookies to remain tender and soft.
I even started sifting my dry ingredients together before adding them to the wet mixture. This ensures even distribution and reduces the need for extensive mixing once the flour hits the liquid, further preventing gluten development. This little trick has saved many batches from the ‘tough cookie’ fate.
Your Oven is Lying to You (And Why an External Thermometer is a Must-Have)
I cannot stress this enough: your oven’s internal thermostat is probably not accurate. For years, I trusted the dial, setting it to 350°F and assuming that’s what I was getting. But a simple, inexpensive oven thermometer revealed the harsh truth: my oven was routinely 25-50°F off! Sometimes hotter, sometimes colder. This inconsistency is a major hidden reason why cookies (and other baked goods) often turn out hard or overdone.
The common misconception is that your oven’s display temperature is the actual temperature. An oven that runs too hot will bake your cookies faster, drying them out before they can achieve that soft, chewy interior. An oven that runs too cold will prolong the baking time, also leading to dryness and an often hard, crunchy texture.
What changed everything for me was investing in a standalone oven thermometer. They cost less than $10 and are an absolute game-changer. Hang it inside your oven and monitor it. You’ll likely be surprised by the fluctuations. Once you know your oven’s true temperature, you can adjust accordingly. If your oven consistently runs 25°F hot, set it 25°F lower than the recipe calls for. If it runs cold, set it higher.
Beyond calibration, ovens have hot spots. To combat this, I started rotating my cookie sheets halfway through baking. This ensures even cooking across the entire batch. Consistent, accurate oven temperature is paramount for a chewy texture. Without it, even perfect dough can be ruined. This tool is not optional for serious home bakers; it’s a foundational piece of equipment that dramatically improves success.
The Underbaked Myth: Pulling Cookies Out Sooner Than You Think
This tip might feel counter-intuitive, especially if you’re used to waiting for cookies to look ‘perfectly golden brown’ or ‘fully set’ before pulling them from the oven. But for chewy cookies, it’s about knowing when to stop baking, not when to start seeing deep color.
The mistake I constantly made was baking my cookies until they looked ‘done’ in the oven. This usually meant the edges were deeply golden and the centers looked firm. However, cookies continue to bake for a few minutes after being removed from the hot oven due to residual heat, a phenomenon known as ‘carryover cooking.’ If you wait until they look perfectly done in the oven, by the time they’ve cooled, they will be overbaked and hard.
What actually works is pulling your cookies out when they still look slightly underbaked in the center. The edges should be set and lightly golden, but the very center should still appear a little soft, puffy, and perhaps even a bit shiny. For a standard chocolate chip cookie, this often means 8-10 minutes, not 12-15 as many recipes suggest. I usually err on the side of removing them one minute sooner than I think they need. This slight underbaking allows the carryover cooking to finish them to chewy perfection, rather than dry crispness.
Once removed from the oven, immediately transfer them to a wire rack. Leaving them on the hot baking sheet for too long continues the baking process, potentially leading to hard bottoms. The rapid cooling on the rack helps set the structure while retaining moisture for that desirable chew. This is a subtle but powerful technique that requires trusting your instincts a little more and the visual cues a little less.
The Brown Sugar Secret: Moisture and Chewiness on a Molecular Level
While butter temperature and baking time are crucial, the ratio of your sugars also plays a significant, often underestimated, role in cookie texture. I used to swap out sugars based on what I had, not realizing the profound impact it would have.
The overlooked factor is the specific properties of brown sugar. White granulated sugar contributes to crispness and spread, while brown sugar contains molasses, which is hygroscopic, meaning it attracts and retains moisture. This molasses is the key to a softer, chewier cookie that stays moist for longer.
What actually works is adjusting your sugar ratio to favor brown sugar for chewiness. If a recipe calls for equal parts white and brown sugar, try increasing the brown sugar by 25-50% and reducing the white granulated sugar by the same amount. For example, if a recipe calls for 1 cup of white sugar and 1 cup of brown sugar, try 3/4 cup white sugar and 1 1/4 cups brown sugar. This simple swap significantly boosts the moisture content and chewiness of your final product. I’ve even experimented with recipes that call for mostly white sugar, substituting a portion with brown, and the results are consistently superior in chewiness.
Beyond the sugar itself, I’ve also noticed the importance of properly packing brown sugar. When a recipe calls for ‘packed brown sugar,’ it means precisely that. Press it firmly into your measuring cup to ensure you’re getting the correct amount of molasses-rich sugar, and therefore, the correct amount of moisture. This small detail ensures the intended chewiness is locked in from the start.
Frequently Asked Questions
Q: Why do my cookies always come out flat and hard?
A: Flatness and hardness often stem from a combination of issues: butter that’s too soft or melted, which causes excessive spreading; overmixing the flour, developing too much gluten; and an oven that’s too hot, baking them too quickly and drying them out. Ensure your butter is room temperature (soft but still holding shape), mix flour just until combined, and check your oven temperature with an external thermometer.
Q: Can I save a batch of hard cookies?
A: While you can’t magically make them chewy again, you can soften hard cookies. Store them in an airtight container with a slice of bread or an apple wedge overnight. The cookies will absorb moisture from the bread/apple, making them softer. Just be sure to remove the bread/apple after a day or two to prevent mold.
Q: Does chilling cookie dough help with chewiness?
A: Yes, chilling cookie dough can absolutely help! While it primarily helps prevent excessive spreading (leading to thicker cookies), the resting period also allows the flour to fully hydrate, which can contribute to a more tender texture, and gives the flavors time to meld. I often chill my dough for at least 30 minutes, or even overnight, for better results.
Q: How do I know if my butter is the right ‘room temperature’?
A: Room temperature butter should be cool to the touch but soft enough that your finger leaves a slight indentation when pressed gently. It should not be shiny, greasy, or melting. If it’s too warm, pop it back in the fridge for 5-10 minutes to firm up slightly before creaming.
Q: My recipe doesn’t use brown sugar, how can I make those cookies chewier?
A: Even if a recipe primarily uses white sugar, you can experiment with substituting a portion of the white sugar (say, 1/4 to 1/2 of it) with brown sugar. For example, if a recipe calls for 1 cup of granulated sugar, try 1/2 cup granulated and 1/2 cup packed light brown sugar. This will introduce molasses, boosting moisture retention and chewiness. Also, ensure you’re not overbaking and using properly softened butter.
Breaking free from the cycle of hard, dry cookies has been one of my most satisfying baking triumphs. It’s not about complex techniques or expensive ingredients, but rather a deeper understanding of the subtle science behind successful baking. By mastering butter temperature, preventing overmixing, trusting an external oven thermometer, pulling your cookies a minute earlier, and leveraging the power of brown sugar, you’re not just baking cookies—you’re crafting perfect, chewy delights every single time. Happy baking!
Written by Sarah Jenkins
Home budgeting and frugal living
A former community organizer, Sarah brings a knack for finding resourceful solutions to common household challenges.
You Might Also Like

Why Your DIY Furniture Makeover Chips and Peels (And How to Get a Lasting, Pro Finish)
Stop chipping and peeling! Discover the overlooked mistakes in DIY furniture makeovers and pro techniques for a durable, flawless finish that lasts.

Why Your Homemade Cookies Are Flat, Not Puffy (And The Pro Secrets That Guarantee Bakery-Perfect Results Every Time)
Ever wonder why your homemade cookies spread flat instead of staying puffy? Discover the pro secrets to achieve bakery-perfect results.
Why Your Homemade Cookies Are Flat, Not Puffy (And The Pro Secrets That Guarantee Bakery-Perfect Results Every Time)
Tired of flat cookies? Discover the overlooked mistakes in your baking and the pro secrets for perfectly puffy, chewy cookies every time.