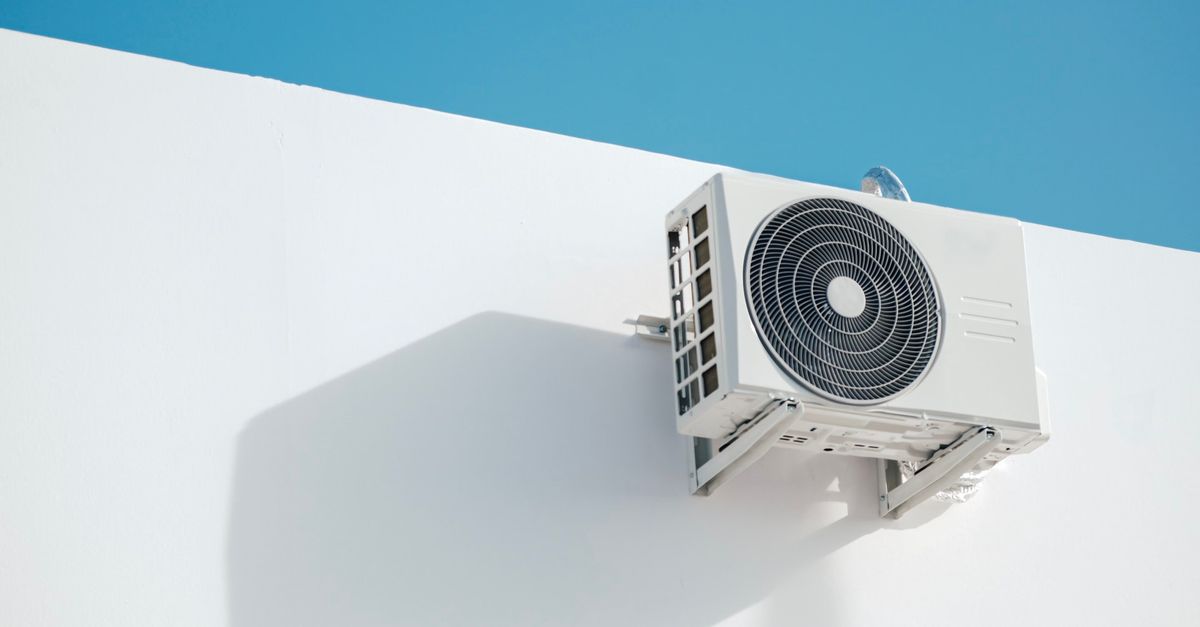
Why Your Home Air Conditioning is So Loud (And The Simple Fixes Most People Miss)
Is the constant drone or sudden clanking from your home air conditioning unit driving you absolutely crazy? You’re not alone. I’ve heard countless friends and family members complain about their AC sounding like a small jet engine or a haunted house full of rattling chains. For years, I just accepted it as part of summer, cranking up the TV volume to drown it out, or worse, just tolerating the racket.
But the truth is, a noisy AC isn’t just an annoyance; it’s often a symptom of an underlying problem that can lead to higher energy bills, reduced cooling efficiency, and even costly breakdowns. What changed everything for me was realizing that many of these noise issues aren’t complex, expensive repairs. They’re often simple, overlooked maintenance steps or minor adjustments that homeowners can tackle themselves, or easily explain to a technician. I spent a long time thinking that ‘loud AC’ meant ‘expensive AC repair.’ What I found instead was that a little knowledge, applied consistently, makes a massive difference.
This isn’t about just throwing money at the problem or resigning yourself to a summer of noisy discomfort. It’s about understanding the specific sounds your AC makes, what they mean, and the targeted, often simple, solutions that truly work to bring back peace and quiet to your home. You shouldn’t have to shout over your cooling system to have a conversation.
Key Takeaways
- A buzzing sound often indicates an electrical issue or loose fan blade, requiring immediate inspection.
- Rattling or banging noises typically stem from loose parts or debris inside the unit, often fixable with a quick cleanup and tightening.
- Hissing or gurgling sounds signal refrigerant leaks or blockages, which are serious and need professional attention.
- Addressing AC noise promptly not only restores quiet but also prevents larger, more expensive repairs and improves efficiency.
The Electrical Hum: Why Your AC Sounds Like a Giant Bumblebee
One of the most common complaints I hear, and one I personally dealt with for far too long, is a persistent humming or buzzing sound. It’s not quite a mechanical grind, but a deep, vibrating hum that seems to permeate the walls. For years, I assumed it was just the sound of a powerful machine doing its job. The mistake I see most often is people ignoring this sound, thinking it’s ‘normal operation.’ In my experience, a pronounced hum is rarely just normal; it’s a warning sign from your electrical components or a struggling motor.
Let’s break down the common culprits:
- Contactor Issues: This is a crucial electrical switch in your outdoor unit. Over time, the contacts can become worn or pitted, leading to a loud buzzing sound as the unit tries to draw power. A few years ago, my AC developed a hum that kept getting louder. A technician quickly diagnosed a failing contactor. The replacement took less than an hour and cost around $150. Suddenly, the silence was deafening, in the best way possible.
- Capacitor Failure: Capacitors provide the initial jolt of electricity to start your compressor and fan motors. A failing capacitor can cause a motor to hum loudly as it struggles to start or run, sometimes even preventing the unit from turning on at all. This is another relatively inexpensive part to replace, usually in the $100-$300 range, but if left unaddressed, it can burn out your motors.
- Loose Wiring: Vibrations can, over time, loosen electrical connections within both the indoor and outdoor units. This can cause arcing or a buzzing sound. While often simple to tighten, this is definitely a job for a qualified HVAC technician due to the high voltage involved. Never attempt to tighten electrical connections in your AC unit yourself unless you are a trained professional.
- Fan Motor Bearing Issues: If the hum is accompanied by a slight whirring, especially from the outdoor unit, it could be the bearings in the fan motor. As these wear out, they create friction and noise. While a motor replacement is more significant (typically $300-$700), catching it early can sometimes mean just lubricating the bearings, a much cheaper fix. I once had a fan motor that began with a hum, slowly escalating to a grinding noise over a few weeks before I called for service. The repair ended up being on the higher end, underscoring the importance of early intervention.
The key is to realize that electrical hums aren’t just background noise. They indicate a component under stress. Addressing them promptly can prevent a domino effect of more expensive failures down the line.
The Rattles and Bangs: When Your AC Sounds Like It’s Falling Apart
If your AC sounds like it’s trying to shake itself free from its mountings, or like someone is throwing pebbles inside, you’re likely dealing with loose parts or debris. This is often where homeowners can make the quickest, most impactful fixes.
I’ve personally encountered everything from loose screws to fallen twigs causing alarming rattling. The mistake I see most often here is fear – people hear a loud bang or clatter and immediately assume the worst, avoiding opening the unit. What changed everything for me was realizing that many of these issues are external or easily accessible.
Consider these common sources of rattling and banging:
- Loose Screws or Panels: The most straightforward culprit. Over years of vibration and seasonal changes, the screws holding access panels or internal components in place can loosen. A few months ago, my outdoor unit started a distinct rattling. After carefully turning off the power, I inspected it and found two loose screws on an access panel. A quick tighten with a screwdriver, and the rattle was gone. Total cost: $0. Total time: 5 minutes.
- Debris Inside the Unit: Leaves, twigs, small toys, or even small animals can find their way into the outdoor unit. When the fan starts spinning, this debris gets batted around, causing rattling or thumping sounds. Always turn off power to the unit at the breaker before attempting to remove any debris. I once found a small bird’s nest inside my condenser unit – a surprising discovery but an easy fix once the power was off and the fan blades could be safely cleared.
- Loose Fan Blades: The fan blades in both your indoor (blower) and outdoor (condenser) units can sometimes come loose from the motor shaft or become bent. A loose blade will wobble and hit the casing, creating a banging or clanking noise. A bent blade will cause the fan to become unbalanced, leading to excessive vibration and noise. This is usually visible upon inspection (again, power off first!). Tightening the set screw or gently straightening a slightly bent blade can solve this. If a blade is significantly bent, it needs replacement to prevent further damage to the motor.
- Vibrating Ductwork: Especially with older systems or ductwork that wasn’t properly secured, the force of the air moving through the system can cause ducts to rattle against joists or other structures. This is particularly common in basements or attics. While harder to access, securing loose duct sections with screws, straps, or even foam insulation can make a significant difference. My attic ductwork once rattled so much it sounded like a ghost in the ceiling; strategically placed foam strips quieted it entirely.
- Failing Motor Mounts: The motors for your fan or compressor are held in place by mounts that absorb vibration. If these mounts degrade or break, the motor will vibrate excessively, leading to rattling and banging. This is a more complex repair that requires a technician.
Don’t let loud rattles or bangs intimidate you. Many times, a careful visual inspection with the power safely off can reveal the problem, and often, the solution is simpler than you think.
The Hisses, Gurgles, and Squeals: When Your AC Has a Serious Condition
While humming and rattling can often be addressed with basic maintenance, certain sounds indicate more serious issues that demand professional attention. Ignoring these sounds is the fast track to a complete system failure and a much larger repair bill. In my experience, these are the noises that signal system-level problems that go beyond simple component fixes.
Here’s what to listen for and why:
- Hissing Sounds: A distinct hissing sound, especially from the indoor unit or refrigerant lines, almost always points to a refrigerant leak. Refrigerant is under high pressure, and a leak will produce a noticeable hiss as the gas escapes. This is not something to ignore. Low refrigerant means your AC will struggle to cool, work harder (increasing energy bills), and can eventually damage the compressor, which is the most expensive part of your AC system. I had a small hiss from my outdoor unit that I dismissed for a week, thinking it was just ambient noise. When the cooling performance dropped drastically, a technician found a significant leak. The repair included finding and patching the leak, and then recharging the system, costing several hundred dollars. Had I called earlier, the compressor might have been saved from excessive strain.
- Gurgling or Bubbling Sounds: These noises, particularly if they come from the indoor unit or near the refrigerant lines, also often indicate refrigerant issues. It could be air mixed into the refrigerant lines due to an improper charge or a leak, or a blockage that’s causing the refrigerant to bubble as it flows. Like hissing, this points to a problem that needs a professional to diagnose and fix properly. They’ll need to check pressure levels and potentially recharge the system after fixing any leaks.
- High-Pitched Squealing or Screeching: This is usually a sign of a failing motor bearing or a loose fan belt (in older systems). If you hear a loud, piercing squeal every time your AC starts or runs, it means a metal component is grinding against another. For fan motors, this indicates the bearings are severely worn out. If left unaddressed, the motor will seize completely. This typically requires a motor replacement. My friend’s AC started with a quiet squeal that escalated to a full-blown screech within days. He ignored it, and the motor eventually burned out entirely, leading to a much more complex and costly repair than if he’d acted on the initial warning.
- Clicking (beyond normal startup/shutdown): While a single click at startup and shutdown is normal for relays, persistent or rapid clicking sounds can indicate an electrical control issue, such as a faulty thermostat, a failing relay, or a problem with the compressor’s starting mechanism. These often point to an impending electrical failure and should be investigated by a professional to prevent further damage.
These sounds are not just nuisances; they are urgent messages from your AC that it’s in distress. Ignoring them will almost certainly lead to more extensive and costly repairs, and potentially a complete system replacement.
Overlooked Maintenance That Makes Your AC Scream (Or Whisper)
Many homeowners focus on big repairs, but in my experience, consistent, simple maintenance is the most powerful tool for keeping your AC quiet and efficient. The mistake I see most often is neglecting the basics. What changed everything for me was creating a seasonal AC maintenance checklist that I actually stick to.
Here are the critical, yet often overlooked, maintenance tasks that directly impact your AC’s noise levels and overall performance:
- Dirty Air Filters: This is the absolute easiest and most impactful thing you can do. A clogged air filter restricts airflow to your indoor unit, forcing the blower motor to work harder. This extra strain can cause the motor to hum louder, whine, or even vibrate excessively. I recommend checking your filter monthly and replacing it every 1-3 months, depending on pet ownership and allergies. I mark it on my calendar for the first of every month. The difference in airflow and noise reduction after swapping a dirty filter for a clean one is immediately noticeable, and it dramatically impacts efficiency. Think of it: a $10 filter can save you hundreds in energy bills and potential motor repairs.
- Clogged Condensate Drain Line: Your indoor unit removes humidity from the air, and that moisture drains away through a condensate line. If this line gets clogged with algae or debris, water can back up, leading to a gurgling sound, and eventually, a leak. Sometimes, the standing water can even attract pests or cause the emergency float switch to trip, shutting off your unit. Flushing the line with a cup of distilled vinegar a few times a year can prevent this. I learned this the hard way with a minor flood in my basement, accompanied by an unsettling gurgle from the unit above.
- Unbalanced Outdoor Fan: The outdoor condenser fan blades can accumulate dirt and debris over time, leading to an imbalance. This imbalance causes the fan to wobble and create excessive vibration and noise. After powering down the unit at the breaker, gently clean the blades. Ensure they aren’t bent or damaged. This simple step can significantly reduce the ‘airplane taking off’ sound from your outdoor unit.
- Loose Cover Panels and Grilles: Just like with rattling sounds, outdoor condenser panels and indoor return air grilles can loosen over time. Inspect both for loose screws and tighten them. Ensure the grille over your indoor air return is securely fastened; a vibrating grille can create a surprising amount of noise.
- Uninsulated Refrigerant Lines: Sometimes, the noise isn’t from the unit, but around it. The refrigerant lines connecting your indoor and outdoor units can sometimes vibrate against each other or against the house structure, creating a subtle hum or vibration that transmits through the walls. Ensuring these lines are properly insulated and secured can dampen these vibrations. This is a bit more advanced, but a technician can easily check and fix it.
Neglecting these simple tasks is like driving your car without ever changing the oil. Your AC system is designed to run smoothly, and giving it the basic care it needs will pay dividends in quiet operation, lower bills, and a longer lifespan.
The Installation Factor: Why Your AC Was Always Loud From Day One
Sometimes, the problem isn’t wear and tear or neglected maintenance; it’s poor installation right from the start. I once lived in a house where the AC unit, even when brand new, was noticeably louder than any other I’d experienced. I blamed the unit itself, but after a few years, a particularly observant technician pointed out critical installation flaws. The mistake I made was assuming ‘new installation’ meant ‘perfect installation.’ What changed everything was understanding that even small installation errors can lead to chronic noise.
Here are critical installation factors that contribute to excessive noise:
- Improper Sizing: An AC unit that is too large for your home will cycle on and off frequently (short-cycling). Each startup is a noisy event. An oversized unit cools too quickly, then shuts off, only to turn back on soon after, leading to constant noise fluctuations and reduced efficiency. Conversely, an undersized unit will run constantly, causing a perpetual drone. A proper load calculation is crucial during installation.
- Unlevel Outdoor Unit: The outdoor condenser unit should sit on a perfectly level pad. If it’s uneven, the compressor can vibrate excessively, leading to a deep hum or rattling that transmits through the ground and into your home. This is often an easy fix by placing shims under the pad, but it should have been correct during installation. My first AC’s incessant hum was significantly reduced once the unit was properly leveled on its concrete pad.
- Insufficient Vibration Dampening: HVAC units, especially compressors, generate vibration. Professional installers use rubber pads, spring mounts, and other dampening materials to isolate these vibrations from the house structure. If these weren’t used or were installed incorrectly, the vibrations can travel through the floor joists or walls, making the entire house seem to hum. This can be tricky to correct post-installation but adding vibration pads under the unit can help.
- Ductwork Installation Issues: Poorly designed or installed ductwork can be a major source of noise. Too many sharp turns, undersized ducts, or unsealed seams can create turbulent airflow, leading to whistling, whooshing, or rattling sounds. Furthermore, if ducts are not properly secured, they can vibrate against walls or ceilings. This is a complex issue to fix and often requires a professional duct assessment.
- Location and Placement: While sometimes unavoidable, placing the outdoor unit directly under a window or too close to a bedroom wall can amplify noise transmission. Good installers consider acoustics when choosing a location. While you can’t easily move an installed unit, landscaping (shrubs, fences) can sometimes help dampen sound, though never restrict airflow to the unit.
If your AC has always been noisy, even after professional service, it’s worth having an experienced technician assess the original installation. Sometimes, fixing these foundational issues is the only way to achieve true quiet.
The Compressor’s Cry: When the Heart of Your AC is in Trouble
Your compressor is the heart of your air conditioning system. It’s responsible for circulating refrigerant and creating the cooling cycle. When it starts making unusual noises, it’s a critical warning that something is seriously wrong and often points to the most expensive repair. The mistake I see here is delayed action, hoping the noise will just ‘go away.’ What changed everything for me was learning to recognize the distinct sounds of a struggling compressor, because it demands immediate attention.
Here are the alarming sounds that signal compressor trouble:
- Loud Grinding or Rattling (from the outdoor unit): This is a red alert. If your outdoor unit is producing a loud, harsh grinding or rattling sound, especially during operation, it often indicates internal damage to the compressor. The bearings might be failing, or internal components could be loose or damaged. This usually means the compressor is seizing or on its way out. A compressor replacement is one of the most expensive repairs, often costing $1,500 to $3,000 or more, and sometimes warrants considering a full system replacement if the unit is old.
- Clicking On and Off Rapidly (Short-Cycling): While clicking on and off can be due to a faulty capacitor or thermostat, if it’s accompanied by the compressor making a struggling noise and then shutting down, it could be the compressor overheating or having internal electrical issues. The unit is trying to start but failing, leading to rapid cycling. This puts immense strain on the compressor and other electrical components. I once had a client whose AC was short-cycling with a distinct thump-whirr-click-silence cycle every few minutes. It turned out to be a compressor trying to operate with insufficient refrigerant, leading to overheating and thermal overload shutdowns.
- Loud Squealing: Similar to fan motor issues, a loud, high-pitched squeal coming from the outdoor unit, especially from within the compressor itself, can indicate failing internal bearings. This is less common but equally serious. If you hear this, shut the unit off immediately.
- Bubbling or Sloshing Inside the Compressor: This points to refrigerant issues, often a leak or an incorrect charge, forcing the compressor to work harder than it should. The liquid refrigerant might be vaporizing incorrectly or sloshing around, causing internal distress. As discussed, refrigerant problems quickly lead to compressor failure.
Any unusual, loud, or persistent noise directly from the compressor area should prompt an immediate call to a professional HVAC technician. Do not run the unit if you suspect compressor damage. Continuing to operate a failing compressor can lead to complete failure, potentially spreading metal fragments through your refrigerant lines, which would necessitate a full system flush or even replacement of all major components.
Quieting the Beast: Practical Steps You Can Take Today
You don’t have to tolerate a noisy AC. Based on my years of experience, a proactive approach and a little elbow grease can often resolve many common noise issues. Beyond calling a professional for serious issues, here are actionable steps you can take today to bring peace and quiet back to your home.
- Perform a Visual Inspection (Power OFF!): The very first step for any rattling or minor noise is a careful visual inspection. Crucially, ALWAYS turn off the power to both the indoor and outdoor units at your electrical breaker panel before touching anything. Look for obvious culprits: loose panels, screws, debris caught in the fan blades (outdoor unit), or even anything resting against the unit that could be vibrating. I routinely find loose screws on my outdoor unit that take less than a minute to tighten and eliminate a pesky rattle.
- Clean or Replace Your Air Filter: I cannot stress this enough. This is your first line of defense against many indoor unit noises and efficiency problems. Mark it on your calendar to check every month. If it’s dirty, replace it. It’s a quick, inexpensive fix that often immediately reduces strain on your blower motor, thereby reducing noise. For my household with two shedding dogs, I replace it every 4-6 weeks without fail.
- Clear Debris from the Outdoor Unit: Again, power OFF first! Over time, leaves, grass clippings, and other outdoor debris can accumulate around and inside your condenser unit. This can restrict airflow and, if caught in the fan, cause rattling or thumping. Use a hose to gently spray down the outside fins (never directly into the motor) and carefully remove any larger debris by hand. Ensure the area around the unit is free from overgrown shrubs or plants that could impede airflow or cause vibrations.
- Check and Tighten Loose Components: With the power off, gently test access panels, screws on the fan cage, and any easily accessible components for looseness. A simple screwdriver can often rectify minor rattles and vibrations. Even tightening the screws on your indoor air return grille can eliminate an annoying buzz.
- Consider Vibration Pads: If your outdoor unit sits on a hard surface (concrete pad) and still produces a noticeable hum or vibration, especially if the ground transmits it, consider placing rubber or composite vibration-dampening pads underneath it. These are inexpensive and can significantly reduce transmitted noise. I added these to my unit a couple of years ago, and the reduction in ambient low-frequency hum was remarkable.
- Call a Professional for Persistent or Alarming Sounds: For hissing, gurgling, grinding, or loud screeching sounds – especially those coming from the compressor – do not delay. These often indicate serious mechanical or refrigerant issues that require specialized tools and expertise. An early professional diagnosis can prevent a minor issue from escalating into a full system replacement. Think of it as investing in prevention rather than waiting for a complete breakdown.
Taking these steps will not only help quiet your AC but also extend its lifespan and ensure it runs more efficiently, saving you money in the long run. Don’t just live with a noisy AC; take control and restore peace to your home.
Frequently Asked Questions
Q1: Is a little bit of noise from my AC normal?
A1: Yes, some noise is normal. You’ll typically hear a soft hum from the fan motor and the gentle whoosh of air moving through the ducts. A slight click at startup and shutdown is also normal as relays engage. However, any loud buzzing, banging, rattling, hissing, gurgling, or grinding sounds are not normal and indicate a problem that should be investigated.
Q2: My outdoor AC unit is vibrating intensely. What should I check first?
A2: First, immediately turn off the power to the unit at your main electrical breaker. Then, check if the unit is sitting level on its pad. If not, shims can be placed under the pad. Next, inspect for any loose panels or screws that might be rattling. Finally, carefully check the fan blades for debris or bends, and ensure they are securely attached to the motor shaft. If these don’t resolve it, a failing compressor or fan motor could be the cause, requiring a professional.
Q3: Why does my indoor AC unit make a gurgling sound?
A3: A gurgling sound from your indoor unit typically indicates a problem with the condensate drain line or refrigerant. A clogged drain line causes water to back up, leading to gurgling. You can try flushing it with distilled vinegar. Alternatively, it could signify air or moisture in the refrigerant lines, or a refrigerant leak, which requires a professional HVAC technician to diagnose and repair.
Q4: How often should I clean my outdoor AC unit to prevent noise?
A4: You should ideally clean your outdoor condenser unit at least once a year, preferably in the spring before heavy use. However, if you live in an area with a lot of foliage, pollen, or dust, or if you notice visible debris accumulation, a mid-season cleaning might also be beneficial. Always remember to turn off the power at the breaker before cleaning.
Q5: Can I fix a refrigerant leak myself?
A5: No, absolutely not. Refrigerant leaks are complex to diagnose and repair, requiring specialized tools, knowledge, and certifications due to environmental regulations and safety concerns. Attempting to fix it yourself is dangerous and can lead to further damage to your system. If you suspect a refrigerant leak (hissing or gurgling sounds, diminished cooling), contact a certified HVAC technician immediately.
In conclusion, a noisy air conditioner isn’t just an inconvenience; it’s your home’s way of telling you something is amiss. By understanding the common sounds and their underlying causes, you can take a proactive approach to maintenance and repairs. Don’t let a noisy AC steal your peace of mind or cost you more in energy bills and major breakdowns. Take action today, and enjoy the quiet comfort your home deserves.
Written by Marcus Thorne
Smart shopping and consumer insights
With a background in consumer advocacy, Marcus is passionate about helping people make informed purchasing decisions.
You Might Also Like

Why Your DIY Furniture Makeover Chips and Peels (And How to Get a Lasting, Pro Finish)
Stop chipping and peeling! Discover the overlooked mistakes in DIY furniture makeovers and pro techniques for a durable, flawless finish that lasts.

Why Your Homemade Cookies Are Flat, Not Puffy (And The Pro Secrets That Guarantee Bakery-Perfect Results Every Time)
Ever wonder why your homemade cookies spread flat instead of staying puffy? Discover the pro secrets to achieve bakery-perfect results.
Why Your Homemade Cookies Are Flat, Not Puffy (And The Pro Secrets That Guarantee Bakery-Perfect Results Every Time)
Tired of flat cookies? Discover the overlooked mistakes in your baking and the pro secrets for perfectly puffy, chewy cookies every time.