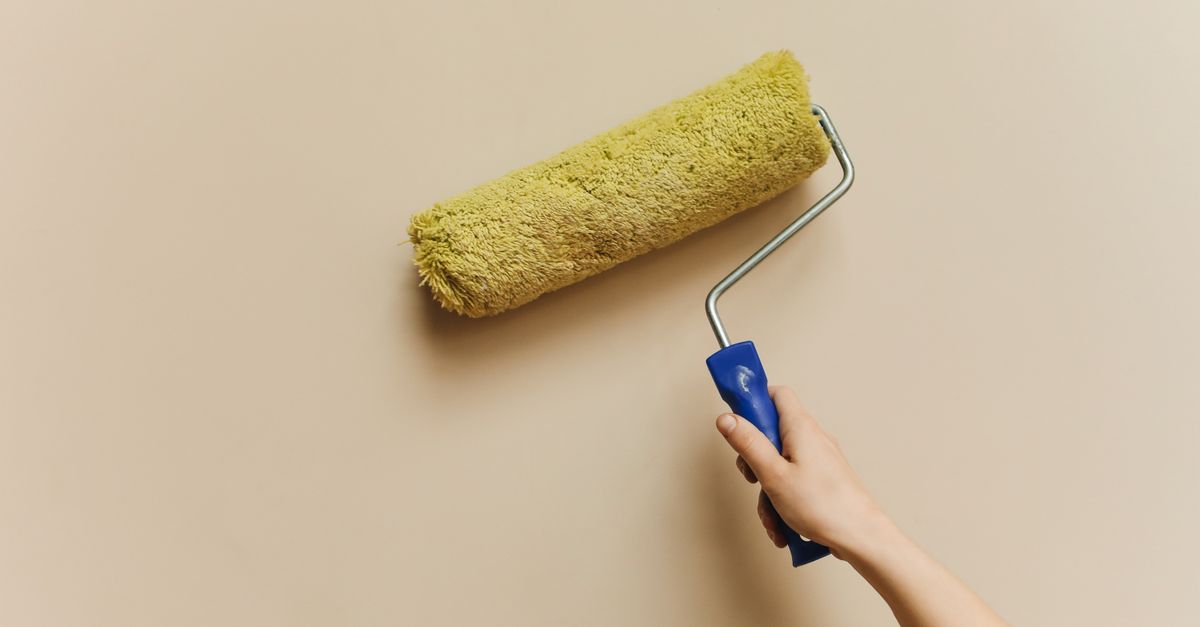
Why Your DIY Paint Job Looks Streaky (And The Pro Techniques Nobody Teaches You)
Painting a room seems deceptively simple. Grab a brush, a roller, some paint, and you’re good to go, right? That’s what I thought the first time I tackled my living room. I envisioned a crisp, uniform finish, the kind you see in home decor magazines. What I got instead was a streaky, uneven mess that screamed ‘amateur.’ Every brushstroke was visible, the roller marks formed ghostly patterns, and don’t even get me started on the drips near the trim. It was frustrating, to say the least, and it felt like I’d wasted an entire weekend and a good chunk of money on something that looked worse than before.
I quickly realized that painting isn’t just about slapping paint on a wall. There’s a subtle art and a science to achieving that professional, streak-free look. After countless hours of research, talking to seasoned painters, and far too many re-dos, I uncovered the critical mistakes most DIYers make and, more importantly, the pro techniques that fundamentally changed my results. This isn’t about expensive tools; it’s about understanding the nuances of paint application and surface preparation that make all the difference.
Key Takeaways
- Proper surface preparation, including thorough cleaning and patching, is the non-negotiable first step to preventing streaks.
- Investing in quality paint and the right tools, especially a premium roller cover and brush, makes a significant difference in paint application and finish.
- Mastering consistent paint loading, proper roller technique, and avoiding overworking the paint are crucial for a smooth, streak-free coat.
- Always apply thin, even coats, allowing adequate drying time between them, to build a uniform and durable finish.
The Real Culprit Isn’t Your Skill, It’s the Prep (Or Lack Thereof)
In my early painting endeavors, I was always eager to get to the fun part: applying color. The prep work felt like a tedious chore, something to rush through. This was my biggest mistake. I learned, the hard way, that 90% of a professional-looking paint job is in the preparation. Skimping here guarantees a streaky, uneven, or peeling finish, no matter how good your paint or technique.
Think of your wall as a canvas. If the canvas is dirty, bumpy, or inconsistent, anything you put on it will highlight those imperfections. For example, I once painted a wall that I thought was clean, only to find mysterious dark streaks appearing. Turns out, it was residue from an old cleaning solution I hadn’t rinsed off properly. The paint reacted to it, creating an ugly, visible trail.
What actually works is a meticulous, multi-step preparation process:
- Clean Beyond Sight: Don’t just wipe; wash your walls. Use a mixture of warm water and a mild detergent (like a teaspoon of dish soap per gallon) or a dedicated TSP substitute. Rinse thoroughly with clean water, wiping until no suds or residue remain. Let the walls dry completely. This removes grease, grime, and hidden contaminants that prevent paint adhesion and cause streaks or blotches.
- Smooth Operator: Run your hand over every inch of the wall. Feel any bumps? Tiny dings, old nail holes, or flakes of old paint? They will show through your new paint. Patch every hole and crack with spackle or joint compound. For larger imperfections, use a wider putty knife to feather out the patch smoothly. Once dry, sand lightly with 120-150 grit sandpaper until it’s perfectly flush with the wall. Dust off thoroughly.
- Dull the Sheen, Boost Adhesion: If you’re painting over a glossy or semi-gloss finish, the new paint won’t adhere well, leading to easy scratching and an uneven look. Lightly sand the entire surface with fine-grit sandpaper (220 grit) to create a dull, scuffed surface. This ‘gives the new paint something to grip.’ Don’t skip this. I’ve had perfectly good paint peel off high-gloss trim because I thought a quick wipe was enough.
- Prime for Perfection: Primer isn’t just for new drywall or color changes. It creates a uniform surface for your topcoat, ensuring consistent sheen and color. For patched areas or major color shifts, use a high-quality primer. It seals porous patches, blocks stains, and provides a perfectly even base, preventing ‘flashing’ (areas where the paint looks duller or shinier due to inconsistent absorption).
This level of prep might take an extra few hours, even an entire day, but it’s an investment that pays off tenfold in the final appearance and durability of your paint job. Without it, you’re fighting an uphill battle against streaks from the moment you open the can.
Your Tools Are Working Against You (Especially Your Roller)
When I first started, I’d grab the cheapest multi-pack of roller covers and brushes from the discount bin. Paint is paint, right? And a roller is a roller? Wrong. The quality of your tools directly impacts your ability to achieve a streak-free finish. Cheap tools are a primary reason for visible roller marks, brush strokes, and uneven coverage.
Let’s talk rollers first, as they cover most of your wall space. A cheap roller cover has flimsy fibers that don’t hold much paint, distribute it unevenly, and often shed lint into your fresh paint. The result? Patchy coverage, ‘tram lines’ (thick lines of paint at the edge of the roller), and an overall textured, unprofessional look. I used to think my technique was off, but switching to better rollers was a game-changer.
What actually works for tools:
- Premium Roller Covers: This is where you must splurge. Look for woven fabric covers (not foam or cheap synthetic) with a nap size appropriate for your surface:
- 1/4” - 3/8” nap: Best for smooth surfaces like new drywall or previously painted walls.
- 1/2” - 3/4” nap: Good for slightly textured walls or ceilings.
- Never use a nap larger than 1/2” on smooth walls. It will leave too much texture and make streaks more prominent. A good quality roller cover will hold more paint, release it evenly, and leave a smoother finish. Brands like Purdy or Wooster are worth every penny. Clean them thoroughly after each use, and they’ll last for many projects.
- High-Quality Brushes: For cutting in (painting edges and corners), a good brush is essential. Look for brushes with tapered bristles (like an angled sash brush) made from synthetic materials for latex paint. Quality brushes hold a sharp edge, load paint efficiently, and don’t leave noticeable brush marks. My preference is a 2-2.5 inch angled brush.
- Sturdy Roller Frame: A flimsy roller frame will wobble and make it difficult to maintain even pressure, contributing to streaks. Invest in a solid, comfortable roller frame that doesn’t bend under pressure.
- Proper Paint Tray (or 5-gallon Bucket): A large, sturdy paint tray with a good texture grid allows you to load your roller properly without overloading it. For larger projects, a 5-gallon bucket with a grid is even better, as it holds more paint and reduces refill frequency, maintaining consistency.
Using the right tools dramatically reduces the effort required and significantly improves the outcome. It’s like trying to cut steak with a butter knife versus a sharp chef’s knife – the right tool makes the job easier and the result far superior.
The Paint Itself: More Than Just Color
Beyond tools, the paint you choose plays an enormous role in whether you achieve a streak-free finish. I once bought a gallon of paint solely based on color and price, and it was a nightmare. It was thin, required countless coats, and still looked uneven. This is a common pitfall for DIYers: underestimating the impact of paint quality and type.
What actually works for choosing paint:
- Quality Over Cost (Within Reason): Higher-quality paints generally have better pigment concentration and solids content, meaning better coverage with fewer coats. They also have superior leveling properties, allowing the paint to dry to a smoother, more uniform finish, minimizing brush and roller marks. Look for paints labeled ‘paint and primer in one’ (though I still advocate for separate priming on complex surfaces) or those from reputable brands like Sherwin-Williams, Benjamin Moore, or Behr Marquee/Dynasty. These paints are formulated for easier application and a more durable, even finish. I’ve found paying an extra $10-20 per gallon saves me hours of work and a ton of frustration.
- Sheen Matters: The sheen (glossiness) of your paint directly affects how visible imperfections and streaks will be.
- Flat/Matte: Hides imperfections and streaks best, as it reflects minimal light. Ideal for walls in low-traffic areas.
- Eggshell/Satin: Offers a slight sheen, more durable and washable than flat. Still good at hiding minor flaws, but streaks can be more noticeable if technique is poor. My go-to for most living areas.
- Semi-Gloss/Gloss: Very durable and easy to clean, but highly reflective. Every single streak, brush mark, and surface imperfection will be magnified. Reserve these for trim, doors, and high-moisture areas like bathrooms, and only use them if your prep and application technique are flawless.
- Color Considerations: Deep, dark colors (especially reds and blues) often require more coats and can be more challenging to apply without streaks. This is because they need more pigment, which can sometimes affect the paint’s leveling properties. If you’re going for a dramatic dark color, be prepared for an extra coat or two and ensure your primer is tinted towards your final color. This significantly improves coverage and reduces the chance of streaks.
Choosing the right paint for your project and understanding its characteristics is as important as your prep work. It’s an investment that ensures your hard work results in the beautiful, durable finish you envision.
The Pro Technique: Mastering the Roller (No More Tram Lines!)
This is where the rubber meets the road (or rather, the paint meets the wall). I used to just roll in random directions, pressing hard, thinking more paint meant better coverage. The result was exactly what you’d expect: thick, uneven patches, bare spots, and those dreaded tram lines (heavy paint ridges at the roller’s edges). Achieving a streak-free finish with a roller is all about technique, consistency, and patience.
What actually works for roller application:
- Load the Roller Properly: Don’t dunk! Roll your roller into the paint tray (or bucket grid) until it’s saturated but not dripping. Roll it up and down the textured part of the tray/grid a few times to evenly distribute the paint and squeeze out excess. The roller should be ‘fat and wet,’ but not overloaded. An overloaded roller equals drips and thick edges.
- Work in Sections (
WorMPattern): Instead of random strokes, work in small, manageable sections, roughly 2x2 to 3x3 feet. Start by rolling a ‘W’ or ‘M’ shape in your section, spreading the paint without lifting the roller. This lays down an initial amount of paint. - Cross-Hatch and Feather: Immediately after laying down your ‘W’ or ‘M,’ fill in the section with parallel, overlapping vertical strokes. Then, without reloading the roller, lightly roll over the entire section with vertical, feather-light strokes. This
cross-hatching and featheringtechnique evenly distributes the paint, eliminates roller marks, and ensures a smooth, consistent finish. The last pass should always be a light, vertical stroke, moving in one direction (usually top to bottom) to create a uniform texture. - Maintain a Wet Edge: This is critical. Always work quickly enough that the edge of your newly painted section is still wet when you start the next section. This allows the new paint to blend seamlessly with the old, preventing visible ‘lap marks’ or streaks where one section dries before the next is applied. Move across the wall, completing one section before moving to the next adjacent one, always blending into the wet edge.
- Don’t Overwork It: Once the paint is on the wall and you’ve feathered it out, resist the urge to keep rolling over it. As paint starts to dry, rolling over it will only create sticky, uneven textures and pull up drying paint, leading to streaks and an unsightly finish. Move on to the next section.
- Apply Thin, Even Coats: Two thin coats are always, always, always better than one thick coat. A thick coat is prone to drips, dries unevenly, and is more likely to leave streaks. Allow each coat to dry completely according to the manufacturer’s instructions (usually 2-4 hours) before applying the next. If you’re painting a dark color over a light one, you might need a third thin coat.
By following these steps, you’ll find that your roller becomes a tool for creating a truly smooth, professional-looking wall, free from the amateurish streaks that plague so many DIY paint jobs.
The Finer Points: Cutting In and Edge Perfection
While the roller handles the broad strokes, the brush is for the details. If your cutting-in technique is sloppy, it can introduce streaks along edges, uneven lines, and visible brush marks that detract from the overall finish. I used to hate cutting in, seeing it as the most difficult part, until I understood the correct approach.
What actually works for cutting in and edges:
- Load the Brush Correctly: Dip about one-third to half of your brush bristles into the paint. Tap (don’t wipe) excess paint off both sides of the brush against the inside of the paint can or tray. The goal is to have enough paint to flow smoothly without dripping or globbing.
- Use a Steady Hand and Long Strokes: For straight lines, stabilize your hand. If possible, rest your wrist or forearm on the wall for support. Start your stroke a little away from the trim or ceiling, then gently ‘walk’ the bristles towards the edge. Use long, smooth strokes, allowing the paint to flow off the brush. Avoid short, choppy strokes that leave visible marks.
- Feather and Blend: As you cut in, slightly feather the edge of your brush stroke onto the main wall area. This creates a softer transition that the roller can then seamlessly blend into. When rolling the main wall, slightly overlap the cut-in line (about an inch) to eliminate the brush marks and integrate the two areas.
- Don’t Over-Cut (Or Use Too Much Tape!): While painter’s tape can be helpful for very sharp lines or complex trim, relying too heavily on it can also cause problems (like paint bleeding under the tape or pulling off existing paint). In my experience, for most walls and ceilings, a steady hand and good brush technique are faster and deliver better results than wrestling with tape. If you do use tape, press it down firmly, paint a thin coat of the original wall color over the edge of the tape first (to seal it), let it dry, then apply your new color. Remove the tape when the paint is still slightly wet but not tacky to the touch for the cleanest line.
- Work in Manageable Sections: Don’t try to cut in an entire room before rolling. Cut in one wall (or even half a wall) and then immediately follow with the roller. This ensures you maintain a wet edge, allowing the cut-in paint to blend seamlessly with the rolled paint.
With practice, cutting in becomes less daunting and more precise. The key is confidence, a steady hand, and the right amount of paint on your brush – not too much, not too little.
Environmental Factors: The Unseen Saboteurs
Even with perfect prep, tools, and technique, I’ve had paint jobs go awry due to factors I initially overlooked: the environment. Things like temperature, humidity, and airflow might seem minor, but they significantly impact how paint dries and levels, and thus, how prone it is to streaking. One particularly humid summer day, I painted a room only to find the paint staying tacky for hours and showing every single roller mark. It was a mess.
What actually works for ideal painting conditions:
- Ideal Temperature and Humidity: Aim for temperatures between 65-75°F (18-24°C) and relative humidity between 40-60%. Paint cures best in these conditions. Too cold, and it dries slowly, increasing the chance of drips and extending recoat times. Too hot, and it dries too quickly, preventing it from leveling out and creating lap marks. High humidity prolongs drying time, making it tacky and susceptible to streaks and dust.
- Controlled Airflow: While some airflow is good for drying, avoid excessive drafts from open windows or fans blowing directly on the wet paint. This can cause the paint to dry too quickly in spots, leading to unevenness and lap marks. Instead, aim for gentle air circulation. If it’s humid, a dehumidifier can be your best friend to bring the room into the ideal range.
- Consistent Lighting: Paint during daylight hours if possible, or use good, consistent artificial lighting (like a work light) that mimics natural daylight. This allows you to see your coverage clearly and spot any missed spots or streaks as you work. Trying to paint in dim, uneven light is a recipe for disaster; you won’t see imperfections until the paint dries.
- Dust Control: Minimize dust! Dust specks will stick to wet paint and create tiny bumps, which can then cause shadows and contribute to a streaky appearance. Vacuum the room thoroughly before painting, use a damp cloth to wipe down surfaces, and keep windows closed while painting to prevent external dust and pollen from entering.
Controlling these environmental factors creates the perfect stage for your paint to perform its best, allowing it to dry evenly and level smoothly, sealing in your hard work with a professional, streak-free finish.
Frequently Asked Questions
Q1: Why does my paint look streaky even after multiple coats?
A1: Multiple coats won’t fix poor preparation or technique. Streaks often occur due to uneven paint application (too much or too little paint on the roller/brush), not maintaining a wet edge, or rolling over partially dry paint. Inadequate surface prep, like not cleaning or priming properly, can also cause inconsistencies that appear as streaks. Ensure you’re applying thin, even coats and allowing each to dry fully.
Q2: How can I fix existing streaks without repainting the entire wall?
A2: For minor streaks, lightly sand the affected area with very fine-grit sandpaper (220-320 grit) until smooth. Clean off dust, then apply one or two thin, even coats using the proper roller or brush technique described in the article, blending carefully into the surrounding area. For severe streaking, a full re-prep and repaint of the wall section (or entire wall) might be necessary to achieve a uniform finish.
Q3: Should I dilute my paint to prevent streaks?
A3: Generally, no. Most modern latex paints are formulated to be applied as is. Diluting latex paint too much can reduce its hiding power, compromise its durability, and make it more prone to drips and uneven coverage. If your paint feels exceptionally thick, consult the manufacturer’s instructions for thinning guidelines, but only add a minimal amount of water (usually no more than 1/2 cup per gallon).
Q4: How long should I wait between coats of paint?
A4: Always follow the paint manufacturer’s recommendations, usually found on the back of the can. This is typically 2-4 hours for latex paints. Waiting too short can lead to lifting of the previous coat and streaking, while waiting too long (days or weeks) can sometimes affect adhesion between coats, though this is less common than recoating too soon. The paint should feel completely dry to the touch, not tacky.
Q5: Is it better to use a brush or a roller for a streak-free finish?
A5: Both are essential for a professional finish. Rollers are best for large, flat surfaces like walls and ceilings, as they provide broad, even coverage. Brushes are used for ‘cutting in’ along edges, corners, and trim, where a roller cannot reach precisely. The key to a streak-free finish is mastering the correct technique for each tool and ensuring they blend seamlessly where they meet.
The Final Stroke: Patience and Practice
Transforming a streaky, amateurish paint job into a smooth, professional-looking finish isn’t about magic; it’s about method. My own journey from frustrated DIYer to confident home painter was a testament to the power of understanding these underlying principles. I wasted so much time and money by rushing, using the wrong tools, and ignoring the crucial prep work.
What changed everything for me was embracing the process. I learned to view the cleaning, patching, sanding, and priming not as chores, but as foundational steps that guaranteed a beautiful result. Investing a little more in quality paint and a good roller cover paid for itself in reduced coats and a far superior finish. And finally, learning to load my roller properly, work in sections, and maintain a wet edge eliminated those ugly tram lines forever.
My advice? Slow down. Read the instructions on your paint can. Practice your technique on a hidden section of wall if you’re nervous. You’ll be amazed at the difference it makes when you approach painting with the knowledge of a pro, rather than just a can and a prayer. Your walls—and your satisfaction—will thank you for it.
Written by Marcus Thorne
Smart shopping and consumer insights
With a background in consumer advocacy, Marcus is passionate about helping people make informed purchasing decisions.
You Might Also Like

Why Your DIY Furniture Makeover Chips and Peels (And How to Get a Lasting, Pro Finish)
Stop chipping and peeling! Discover the overlooked mistakes in DIY furniture makeovers and pro techniques for a durable, flawless finish that lasts.

Why Your Homemade Cookies Are Flat, Not Puffy (And The Pro Secrets That Guarantee Bakery-Perfect Results Every Time)
Ever wonder why your homemade cookies spread flat instead of staying puffy? Discover the pro secrets to achieve bakery-perfect results.
Why Your Homemade Cookies Are Flat, Not Puffy (And The Pro Secrets That Guarantee Bakery-Perfect Results Every Time)
Tired of flat cookies? Discover the overlooked mistakes in your baking and the pro secrets for perfectly puffy, chewy cookies every time.