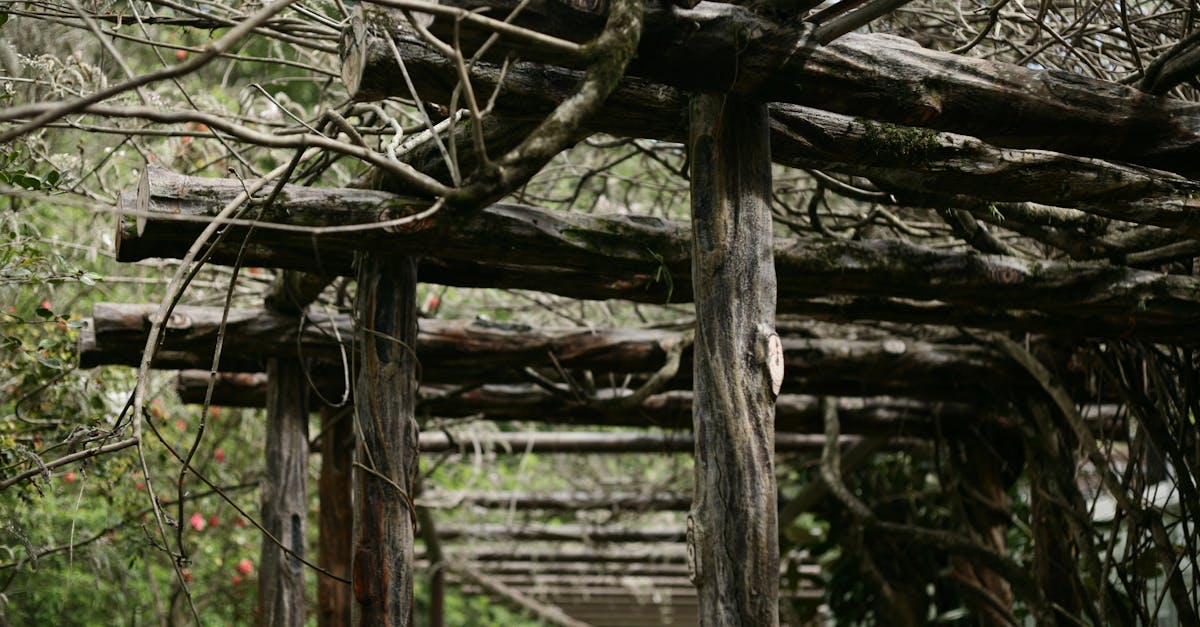
Why Your DIY Garden Trellis Collapses (And The Pro Secrets for Lasting Support)
Are you tired of lovingly constructing a DIY garden trellis, only to watch it buckle, lean, or completely collapse under the weight of your flourishing plants just as they hit their peak? I know that frustration all too well. For years, I’d spend hours on what I thought were sturdy trellises, only for my cucumbers to drag them down or my climbing roses to twist them into submission. It felt like I was constantly battling gravity and my own engineering shortcomings.
The internet is flooded with beautiful DIY trellis ideas, but most of them gloss over the critical, nuanced details that separate a Pinterest-perfect dream from a real-world disaster. They show you the pretty part, but rarely the nitty-gritty of how to build something that actually endures wind, rain, and the immense, relentless growth of a healthy plant. The mistake I see most often isn’t in the idea of the trellis, but in the fundamental understanding of load, leverage, and the very materials we choose.
After years of trial and error, a few spectacular collapses (RIP, prize-winning tomato plant), and finally learning from seasoned nursery owners and structural garden designers, I’ve uncovered the core reasons most DIY trellises fail. What changed everything for me was realizing it wasn’t just about making it look strong; it was about making it functionally strong against forces you might not even consider. If your DIY trellises are destined for a dramatic fall, this article will show you exactly where you’re going wrong and, more importantly, what actually works for lasting support.
Key Takeaways
- Most DIY trellises fail due to underestimating plant weight, using inappropriate materials, and lacking proper foundational anchoring.
- Avoid single-point ground insertion; instead, create a wide, stable base or anchor to an immovable structure.
- Choose rot-resistant, weather-treated materials and build with redundancy, distributing plant weight across multiple points.
- Proactively consider wind, plant growth patterns, and future maintenance during the design phase for longevity.
Underestimating the True Weight of a Mature Plant (The Silent Killer of Trellises)
This is arguably the most common and devastating mistake. When you’re building a trellis, you’re often envisioning a delicate vine just starting its journey. What you should be envisioning is a Godzilla-sized plant, heavy with fruit or dense foliage, after a soaking rain, being buffeted by a strong gust of wind. That’s the real stress test.
Think about a single indeterminate tomato plant. By late summer, it can easily reach 6-8 feet tall, each stem laden with dozens of heavy tomatoes. Now multiply that by the sheer volume of leaves and branches. After a good rain, that plant can weigh anywhere from 20 to 50 pounds, sometimes more. A vigorous cucumber vine or a mature climbing rose can be even heavier. Most DIY plans, especially those using thin bamboo stakes or lightweight twine, simply aren’t designed to handle this kind of load.
What Actually Works:
To counter this, you need to build with a significant buffer. If you think a plant will weigh 20 pounds, design for 40-50 pounds. This means:
- Thicker Gauge Materials: Instead of thin bamboo, opt for 1-inch or 1.5-inch thick pressure-treated lumber, heavy-gauge rebar, or sturdy galvanized metal conduit. For netting, choose heavy-duty nylon or metal mesh, not delicate garden twine.
- Reinforced Joints: Don’t just butt-join pieces of wood. Use L-brackets, lag screws, or carriage bolts. For bamboo or branches, use strong lashings with UV-resistant rope or heavy zip ties, and consider drilling pilot holes to prevent splitting.
- Distributed Support: Instead of one central column, design a trellis that distributes the weight across multiple vertical and horizontal elements. A grid, A-frame, or fan shape will always outperform a single stake.
In my own garden, I learned this the hard way with a spectacular zucchini collapse. I’d built a beautiful, lightweight teepee of bamboo stakes, perfect for what I thought was a moderately heavy plant. By August, the zucchini had transformed into a jungle, and a combination of heavy fruit and a late-season storm brought the entire structure down, snapping several bamboo poles in the process. My next iteration involved thick cedar posts and galvanized cattle panel, anchored deeply. It’s stood strong for years, even through hurricane remnants.
Flawed Foundation and Anchoring (The Root of All Collapse)
A trellis is only as strong as its connection to the ground. This is where many DIY projects utterly fail. Simply pushing stakes into loose soil, even a foot deep, is rarely enough for a mature, heavy plant, especially in windy conditions or after prolonged rain softens the ground.
Consider the leverage. A 6-foot tall trellis with a heavy plant on top acts like a giant lever. A slight lean at the base translates to a huge amount of sway and instability at the top. This is particularly true for single-post or narrow-base designs.
What Actually Works:
- Widen the Base: For freestanding trellises, an A-frame or pyramid design that spreads its footprint over a larger area is inherently more stable than a single vertical structure. The wider the base, the harder it is to tip over.
- Deep and Solid Anchoring:
- Post Holes with Concrete: For permanent or semi-permanent trellises, dig post holes 18-24 inches deep (or deeper, depending on your soil and frost line) and set substantial posts (4x4s or 2x4s) in concrete. This provides unmatched stability.
- Ground Anchors: For movable or temporary trellises, use heavy-duty ground anchors (like those used for sheds or swings) secured deep into the soil. These spiral anchors provide far more resistance than simple stakes.
- Rebar Pins: For simpler trellises, drive lengths of rebar (2-3 feet long, 1/2 inch thick) through the bottom horizontal supports and deep into the ground. Bend the top of the rebar over the wood to hold it securely.
- Integration with Immovable Structures: If possible, anchor your trellis directly to a sturdy fence, wall, or raised garden bed frame. This transfers the load to something already engineered for stability.
I vividly recall a client’s beautiful, but ultimately failed, DIY rose trellis. It was a lovely arch, but the two wooden legs were simply pushed into the garden soil a mere 10 inches. After the first heavy bloom and a couple of windy spring days, it began to lean precariously. We ended up having to carefully excavate, add concrete footings, and re-anchor it. A minor inconvenience if done during construction, a major headache mid-season.
Choosing the Wrong Materials (Durability is Key, Not Just Aesthetics)
Many DIY trellis materials look great initially but fail rapidly when exposed to the elements or the abrasive nature of plant growth.
- Untreated Wood: While natural and appealing, most untreated woods (like pine or fir) will rot or degrade quickly in contact with moist soil and constant watering. This weakens the structure from the ground up.
- Thin Twine or String: Cotton, jute, or even thin nylon strings are prone to stretching, fraying, and breaking under the sustained weight and friction of growing plants. UV exposure also degrades many plastics quickly.
- Lightweight Metals: Thin wire or aluminum tubing might seem sufficient, but they can bend, kink, or corrode, especially at connection points, leading to structural failure.
What Actually Works:
- Pressure-Treated Lumber (or Naturally Rot-Resistant Woods): For wooden trellises, use lumber rated for ground contact. Cedar or redwood are naturally rot-resistant alternatives, though more expensive. Ensure all cuts are treated with a wood preservative.
- Galvanized Steel or Powder-Coated Metal: These materials offer excellent strength and corrosion resistance. Cattle panels, hog wire, or heavy-gauge fencing mesh are fantastic for robust trellises. Metal conduit can be bent and joined for custom designs.
- UV-Resistant and Heavy-Gauge Netting/Wire: If using netting, choose a thick, high-quality, UV-stabilized nylon or polypropylene. For wire, opt for galvanized steel wire (12-16 gauge minimum) that won’t rust and can hold significant tension.
- PVC (with caveats): While lightweight and rot-proof, PVC can become brittle with UV exposure over time. It’s best used for internal frameworks or in shaded areas, and needs strong, well-glued joints.
I learned to love galvanized cattle panels after my wooden trellises kept breaking. Cattle panels, typically 16 feet long and 50 inches high, are incredibly sturdy. I bend them into arches or ‘A’ shapes, anchor them with rebar, and they literally last for decades. They’re not the prettiest on day one, but once the plants cover them, they disappear, leaving you with bomb-proof support.
Neglecting Design for Wind and Weather (It’s Not Just About Plant Weight)
Many DIY trellis designs overlook external forces like wind, heavy rain, and even snow or ice. A trellis that stands perfectly still on a calm day can become a sail or a weight-bearing structure in adverse weather, especially once covered in dense foliage.
A large, flat trellis covered in vines acts like a sail, catching the wind and putting immense lateral stress on its anchors. Heavy rain adds significant water weight to leaves and fruit, amplifying the downward pull. If you live in an area with snow, that added weight can be catastrophic.
What Actually Works:
- Open Designs: Incorporate open spaces into your trellis design to allow wind to pass through, rather than push against, a solid wall of foliage. Grid patterns, ladder-style trellises, or even simple lines of taut wire are more aerodynamic.
- Angled Supports: For freestanding trellises, angling the supports (like an A-frame or leaning ladder) provides better stability against lateral forces than purely vertical posts.
- Strategic Placement: Consider prevailing wind directions. Placing a less robust trellis in a sheltered spot can extend its life. For exposed areas, only the strongest designs will do.
- Drainage: Ensure the ground around your trellis drains well. Waterlogged soil offers less resistance to anchors, increasing the likelihood of leaning or falling.
I live in an area prone to strong summer thunderstorms. I once built a beautiful, flat lattice trellis for my pole beans against a fence. It looked great. Then a particularly violent storm rolled through, and the flat surface, completely covered in bean vines, caught the wind like a sail. The entire lattice ripped away from the fence, splintering the wood. Now, for anything against a fence, I use heavy wire or open metal mesh secured with strong eye bolts, allowing the wind to pass right through.
Failure to Plan for Plant Growth and Maintenance (Thinking Long-Term)
A common oversight is building a trellis without considering how the plant will actually interact with it over its entire life cycle, or how you will maintain it.
- Insufficient Climbing Points: Some trellises offer too few points for the plant to grasp, forcing all the weight onto a few weak sections or requiring constant, manual tying.
- Inaccessible for Harvest/Pruning: A trellis that becomes an impenetrable jungle makes harvesting fruit or pruning difficult, leading to neglected plants and potential disease issues.
- Not Detachable: If you grow annuals, a permanent trellis can make end-of-season cleanup a nightmare as you try to disentangle dead vines.
What Actually Works:
- Ample and Appropriate Climbing Surfaces:
- For Tendrils (Cucumbers, Peas): Provide plenty of small-diameter horizontal or vertical elements (string, thin wire, small branches) for tendrils to wrap around. Netting works well.
- For Twining Stems (Beans, Passionflower): Offer vertical poles or thick strings they can spiral up.
- For Scramblers/Clingers (Roses, Bougainvillea): Provide sturdy horizontal bars or open grids where branches can be tied or weave through.
- Design for Access: Build your trellis with enough space between climbing elements to allow you to reach in for harvesting, pruning, and pest inspection. A double-sided A-frame or an arch often offers better access than a flat wall.
- Modular or Detachable Elements: For annuals, consider a modular design where the main support structure is permanent, but the climbing elements (like netting or string) can be easily removed and replaced each season.
- Consider Future Plant Removal: If your trellis is for annuals, how easily can you remove the entire dead plant without damaging the structure? Metal mesh or taut wires make this easier than tightly interwoven wooden slats.
I used to build these elaborate wooden grid trellises for my sweet peas. They looked great when the plants were small. But by mid-season, the peas would grow into an almost solid wall, making it impossible to harvest the pods without trampling the lower plants or breaking branches. Now, I use vertical strings attached to an overhead bar. It’s simple, provides perfect handholds for the peas, and at the end of the season, I just snip the strings at the top and bottom and compost the whole tangled mess. Easy.
Building a robust, long-lasting garden trellis isn’t just about looking good; it’s about anticipating the incredible power of nature and the relentless growth of your plants. By focusing on adequate strength, proper anchoring, durable materials, strategic design, and future maintenance, you can transform your flimsy DIY disasters into reliable, enduring garden workhorses. Don’t just build a trellis; engineer a plant support system that truly works.
Frequently Asked Questions
Q: What’s the best material for a long-lasting DIY trellis?
A: For durability and longevity, galvanized steel (like cattle panels), pressure-treated lumber (rated for ground contact), or naturally rot-resistant woods like cedar are excellent choices. For climbing elements, heavy-gauge galvanized wire or UV-resistant, thick nylon netting are ideal.
Q: How deep should I anchor a freestanding trellis?
A: For substantial, permanent trellises, posts should be set in concrete 18-24 inches deep, or even deeper in areas with loose soil or a deep frost line. For temporary trellises, use heavy-duty ground anchors driven 1-2 feet into the ground or rebar pins through base supports for added stability.
Q: My trellis keeps leaning in the wind. How can I fix it?
A: Leaning often indicates insufficient anchoring or an overly narrow base. You can strengthen it by widening the base (e.g., adding angled supports to create an A-frame), adding deeper ground anchors or rebar pins, or connecting it to a more stable structure like a fence. Ensuring wind can pass through the design (rather than pushing against a solid wall of foliage) also helps.
Q: Is bamboo a good material for a DIY trellis?
A: Bamboo can work for lightweight annuals like peas or small cucumbers, but it has limitations. It can split, rot quickly when in ground contact, and isn’t strong enough for heavy, mature plants like indeterminate tomatoes or climbing roses. For more robust needs, opt for thicker, more durable materials.
Q: How do I plan for different types of climbing plants?
A: Consider the plant’s climbing mechanism: tendril climbers (cucumbers, peas) need thin elements to grasp; twining plants (beans, morning glory) need vertical poles or strings; scramblers/clingers (roses, clematis) need sturdy horizontal supports to be tied to or weave through. Design your trellis to offer ample, appropriate climbing surfaces for your specific plants.
Written by Marcus Thorne
Smart shopping and consumer insights
With a background in consumer advocacy, Marcus is passionate about helping people make informed purchasing decisions.
You Might Also Like

Why Your DIY Furniture Makeover Chips and Peels (And How to Get a Lasting, Pro Finish)
Stop chipping and peeling! Discover the overlooked mistakes in DIY furniture makeovers and pro techniques for a durable, flawless finish that lasts.

Why Your Homemade Cookies Are Flat, Not Puffy (And The Pro Secrets That Guarantee Bakery-Perfect Results Every Time)
Ever wonder why your homemade cookies spread flat instead of staying puffy? Discover the pro secrets to achieve bakery-perfect results.
Why Your Homemade Cookies Are Flat, Not Puffy (And The Pro Secrets That Guarantee Bakery-Perfect Results Every Time)
Tired of flat cookies? Discover the overlooked mistakes in your baking and the pro secrets for perfectly puffy, chewy cookies every time.